Getting around an unfamiliar city can be tough. When we went to London last year, a friend told us about a really useful app called Citymapper. Citymapper helps you get from one place to another using public transit. It’s incredibly easy to use and made navigating London super easy!
We now use it anytime we need to use public transit in one of their supported cities. As of right now they support 39 cities throughout the world. They are continuing to grow, so this number will increase over time. If it’s available in the city you’re visiting, I highly recommend downloading it!
Citymapper is loaded with features and tools. Similar to using Google Maps offline, they allow you to save multiple trips offline, so you can easily get around without using any data.
Don’t have time to read the whole guide right now? No worries! Download a PDF version.
Download the app below:
How to use Citymapper
- Step 1 – Choose the Correct City
- Step 2 – Enter Your Start & End Points
- Step 3 – Click the Green Go Button
- Step 4 – Start Your Journey
- Step 5 – Close Your Journey
How to Save your Citymapper Trips Offline
Step 1 – Choose the Correct City
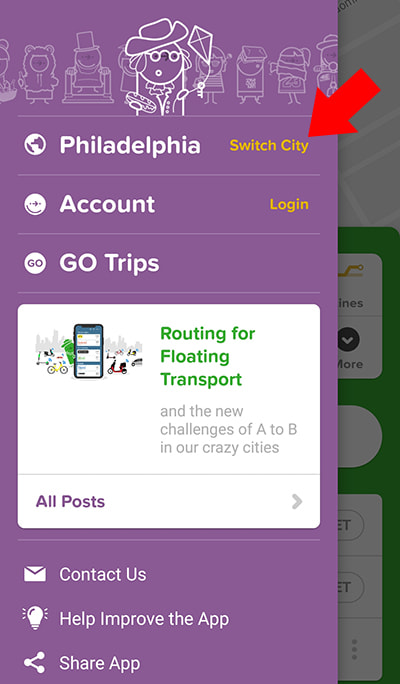
Click the hamburger menu in the top left corner, this will pull up your main settings. At the top of this menu you will choose the correct city. This is normally automatically done by the app, but there’s times when you need to manually select your city.
Step 2 – Enter Your Start & End Points
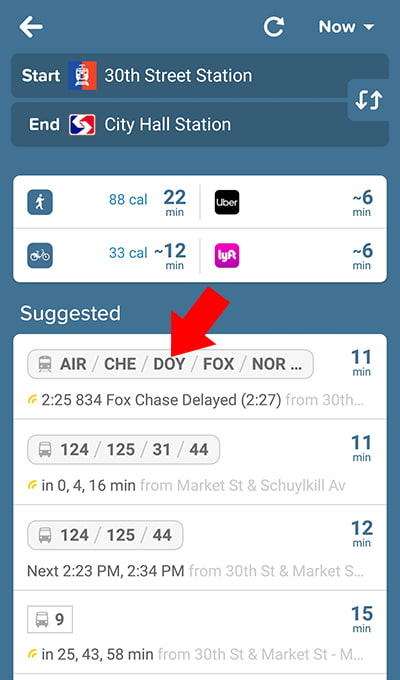
Next, you need to input your start & end points. There’s a few different ways to add your points, I normally click the “Get Me Somewhere” button from the home screen and add my start & end points. This will then pull up the following screen with some suggested methods of transportation. You will then click on one of the suggested tabs.
Step 3 – Click the Green Go Button
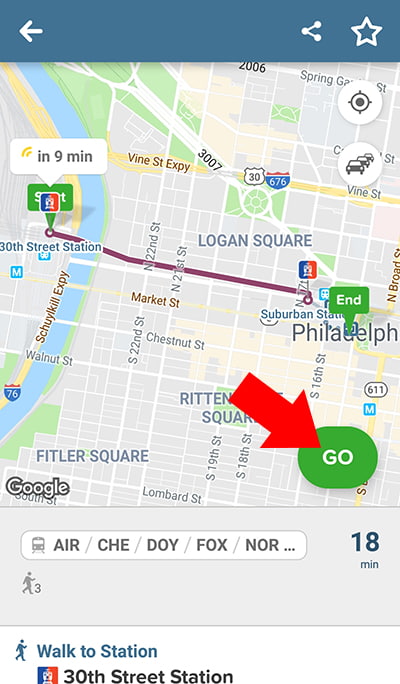
If you’re happy with your selection, then you just need to click that big green “Go” button on the bottom right corner.
Step 4 – Start Your Journey
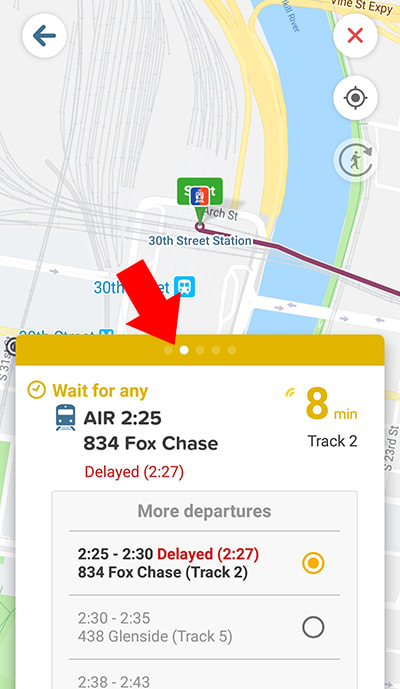
You’ve now officially started your journey! You might have noticed your phone vibrated and a notification appeared. The app is now in turn by turn navigation mode, the GPS will update your location as you being walking. At anytime you can scroll through all the required steps. This is helpful because it will alert you if there’s any delays or schedule changes. It might also give you helpful information, like the best subway car to load. This can actually save you tons of time!
Step 5 – Close Your Journey
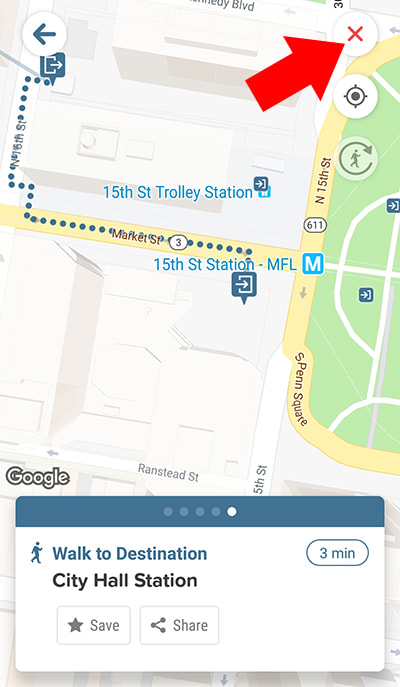
Once you’ve reached your end point, it’s now important to end the turn by turn navigation. If you don’t close your journey, it will continue to use your GPS and kill your phone battery. Click the red X in the top right corner to close your journey.
Just like Google Maps, you can also use Citymapper offline.
This is a feature we use often when traveling in a city that has good public transportation.
How to Save your Citymapper Trips Offline
Step 1 – Save your Trip
Saving a trip for offline mode is very simple, follow the steps 1-3 above. When you get to step 3, instead of clicking the “Go” button, your will the star icon on the top right corner.
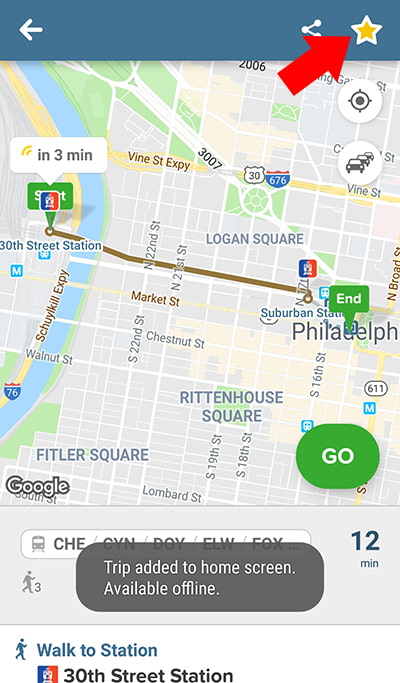
After you click the star icon, your trip will automatically be added to the home screen of the app.
Step 2 – Access your Saved Trips
Navigate to the home screen and you will see a new tab menu called “Saved Trips”. Now you can access any saved trips when you’re offline.
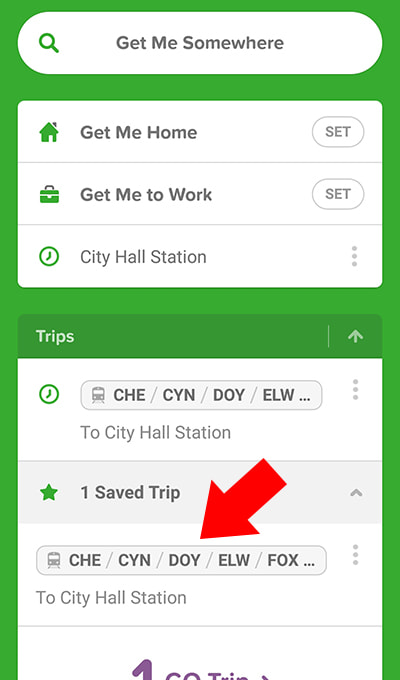
After you choose a saved trip, it will bring you back to step 3. You will now just click the big green “Go” button and use the app as if you’re online.
We think this feature is great! We normally save a bunch of different offline trips for areas that we might be exploring.
Downloadable Guide
We created a downloadable version of this step by step guide for your convenience. We hope this will help you on your travel adventures!
Conclusion
I hope these steps help you navigate a new city! We use the Citymapper app along with Google Maps when we travel.
The 2 apps combined will give you unlimited possibilities!
Note: Any real time information like delays won’t appear when you’re offline. You will need to check for that information once you arrive at your location.
